I will be picking up a used timing chain cover some time soon, so no need to fix this one.


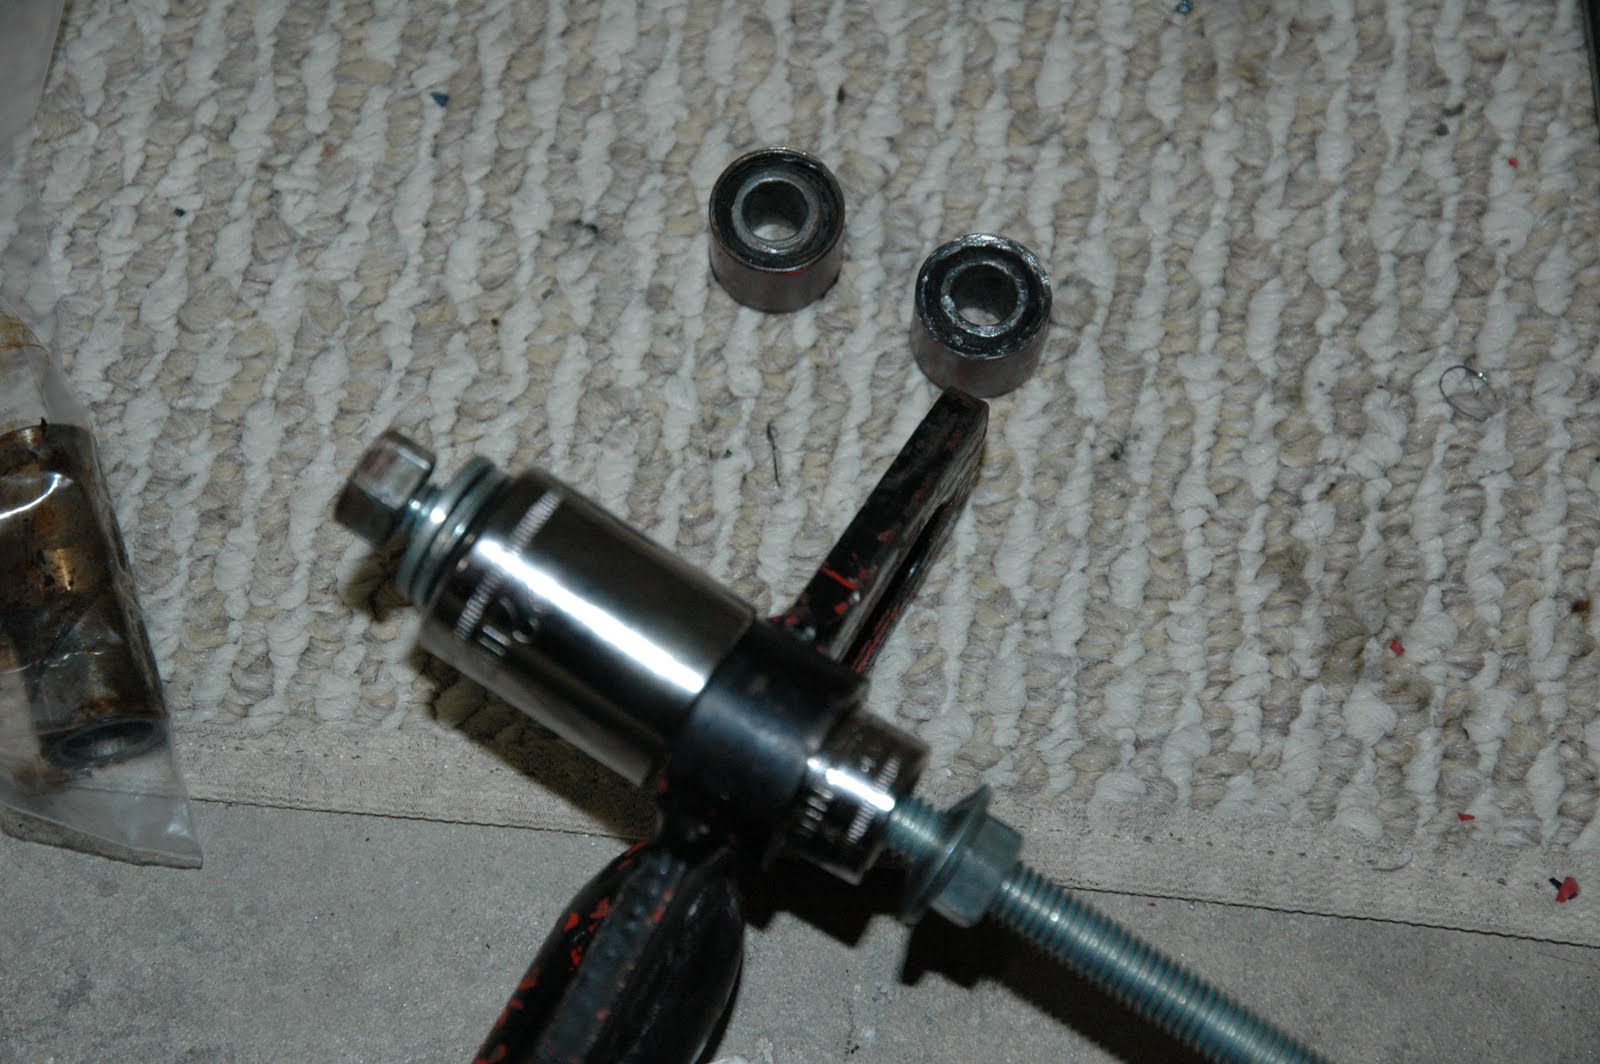
This picture is my home made bushing/bearing remover. I had to remove the bushings that attach to the bottom of the rear shocks out of the swing arm to get it ready for painting.
How it works: The large socket has a bigger inner diameter than the bushing itself, the smaller socket is as close to the outer ring of the bearing/bushing. Use a threaded shaft/bolt with a diameter as close to the inner diameter of the bushing/bearing. Then just tighten the end where the big socket is and it starts to pull the bushing out. I have both bushing already out of the swing arm in the picture.
This picture is the swing arm and the hammer and punch I used to get the bushings out. The metal inserts in the zip lock bag are the main pivoting bearings. These have a hole in them that allow grease from the main shaft lubricating system to enter. The four plastic rings are basically just spacers that center the metal bushing and the main shaft. These probably help in lubricating and help the swing arm move freely. I won't be needing them for the rebuild cause I will probably upgrade to brass ones.

A little cleaning goes a long way! This will probably be the most time consuming part of this whole rebuild. I know these foot peg holders have been cut but I just wanted to see how well the would clean up with a little bit of effort. Every bolt will hopefully be replaced or re-plated and every engine/metal part will be media blasted.


